Despite having a good sized garden, we really have very little suitable space for growing crops, limited to a small raised bed in front of the balcony that has been used for heirloom tomatoes, carrots, habanero and jalapeno peppers. So I embarked on Project Vegetable Garden.
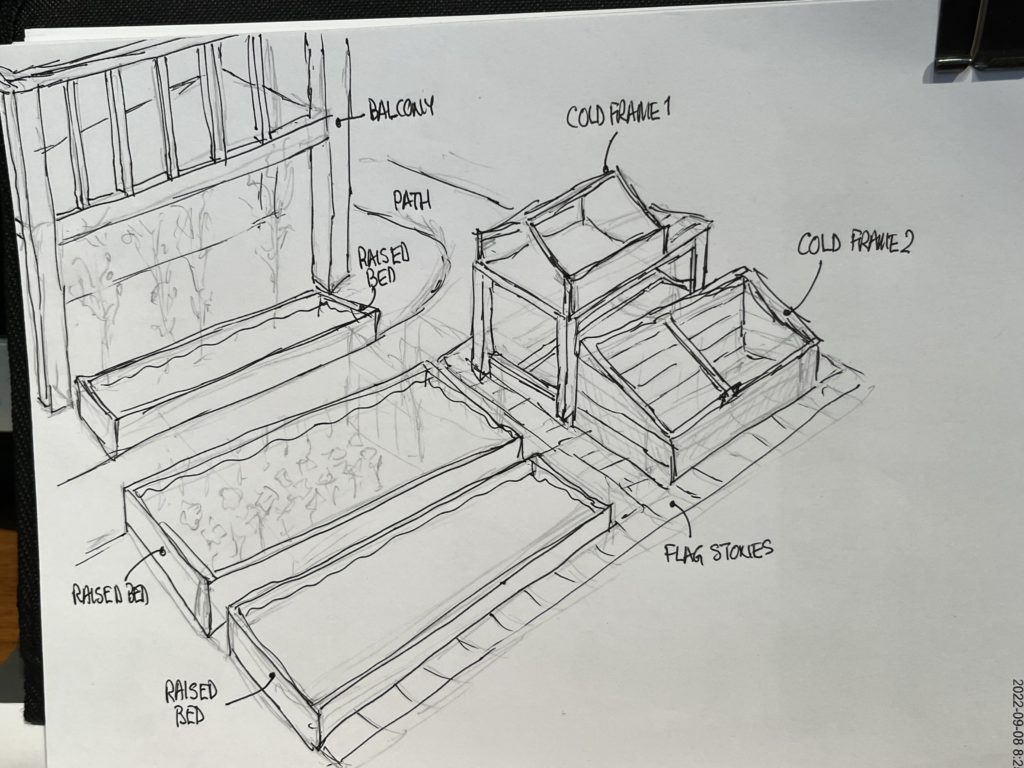
The architect’s drawings called for converting one section of lawn into two large raised beds and relocating two existing “cold frames”. The cold frames would be used for starting plants from seed and for growing more sensitive crops. Planting areas would be separated by flagstone paths to avoid a muddy mess around them. Of course, being in California and suffering from years of drought, an automated irrigation system was mandatory.
Phase 1
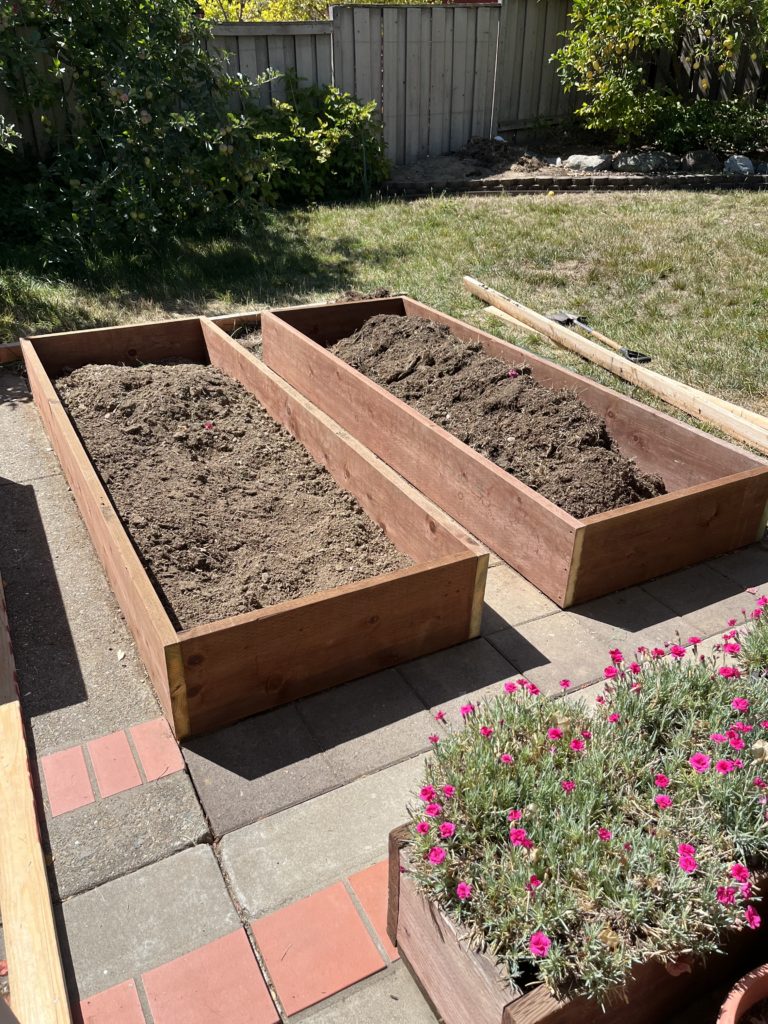
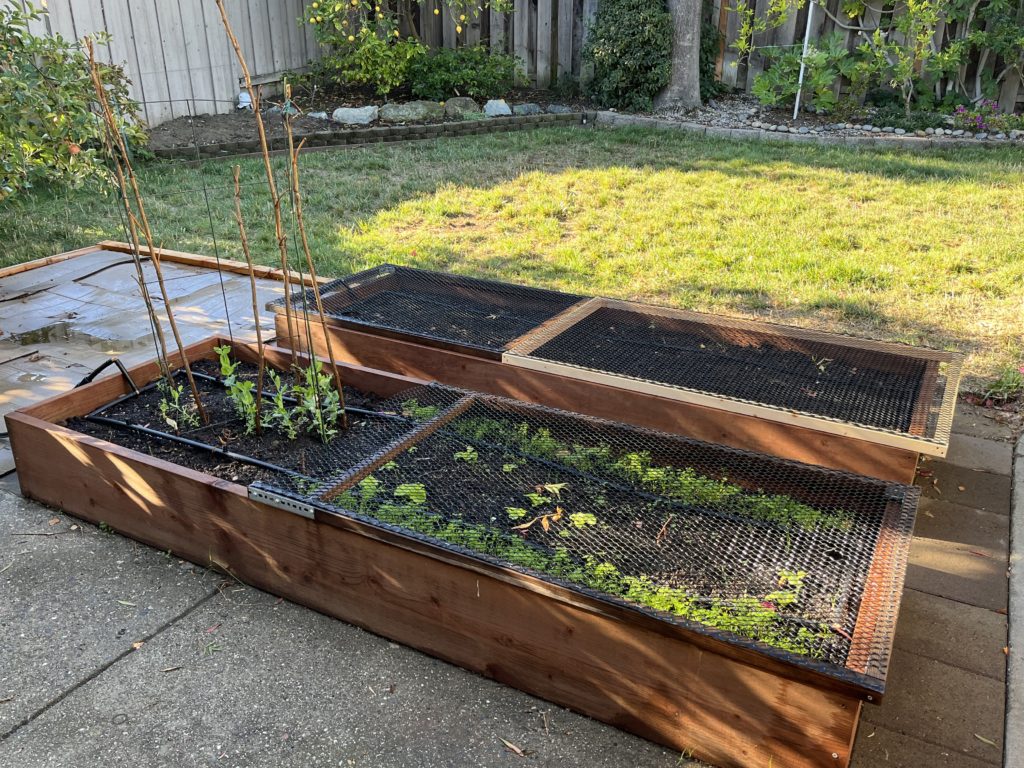
The first phase involved building the two 9 foot by 3 foot raised beds, with a goal of completion in the September timeframe, allowing late fall and winter crops. The area was roughly framed, covered with cardboard and a mulch layer to kill off the grass and to attempt “no-dig” planting.
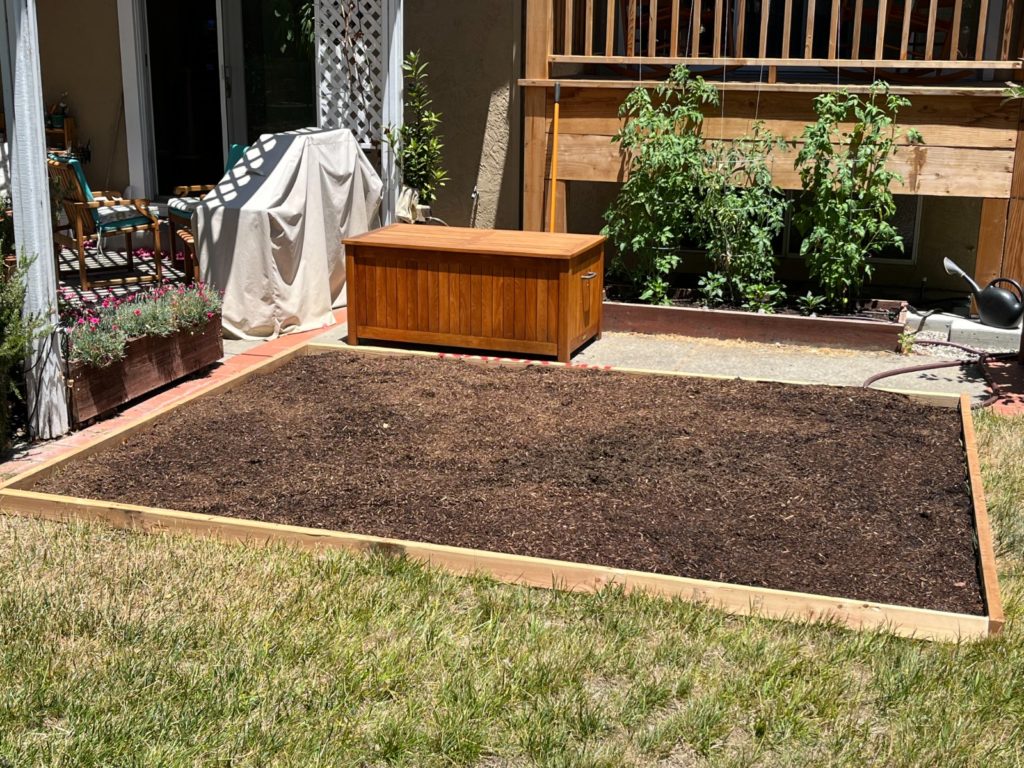
Then the hard work of laying the first flag stones which needed to be flush with the existing concrete deck and path. The raised beds used 12 inch wide pressure treated wood: not ideal for plants but a compromise as it lasts forever. Several Homer buckets of home grown compost and two cubic feet of compost/manure mix later, it was ready for the irrigation solution and planting.
The first crop: I grew a black and white dog that looks a lot like Wally.

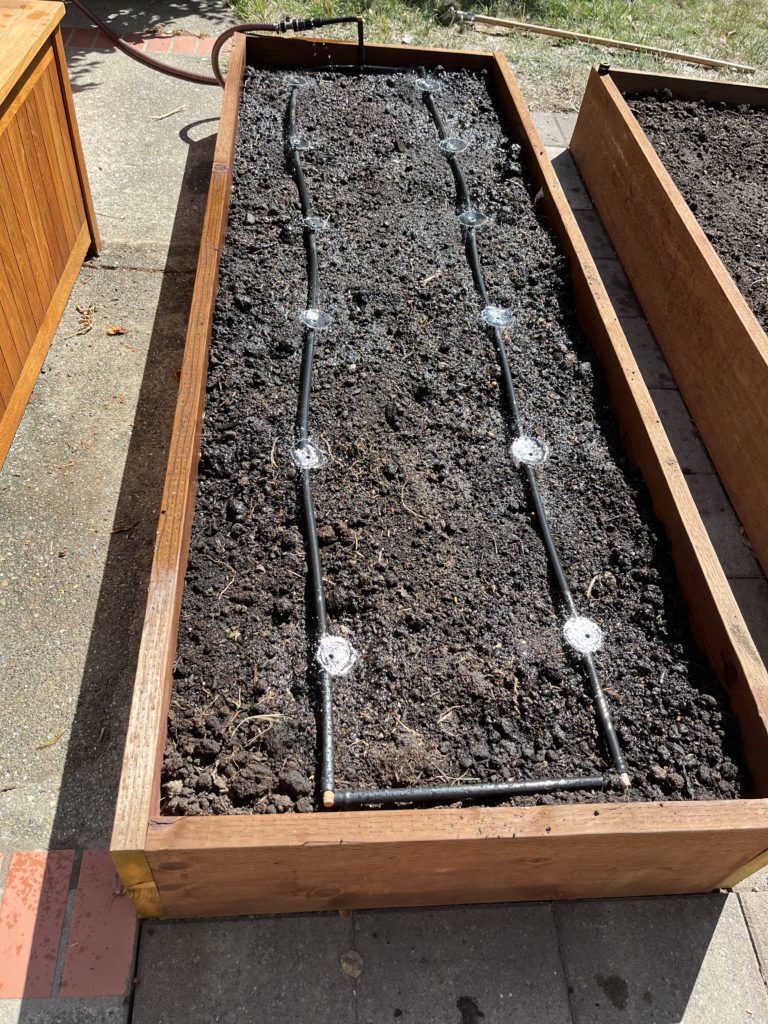
For my existing raised bed I had used emitter drip irrigation, but even after two hours that really didn’t provide enough water in the hot and dry summer for growing tomatoes. This time I used ½ inch tubing with adjustable spray nozzles and temporarily hooked then up as a proof of concept. They seem to work pretty well.
I managed to complete phase 1 in September ready for the winter crops: “Sugar Daddy” snap peas, “Tom Thumb” lettuce and “Chanteney Red Core” carrots. To prevent more volunteer plants that resembled a certain black and white Border collie mix, I cobbled up some screens.
Phase 2
The first step, as with phase1, is to lay cardboard to kill the grass. Now I have to wait until the apple tree has been harvested and there is enough head room to lay the paths and prepare the ground.
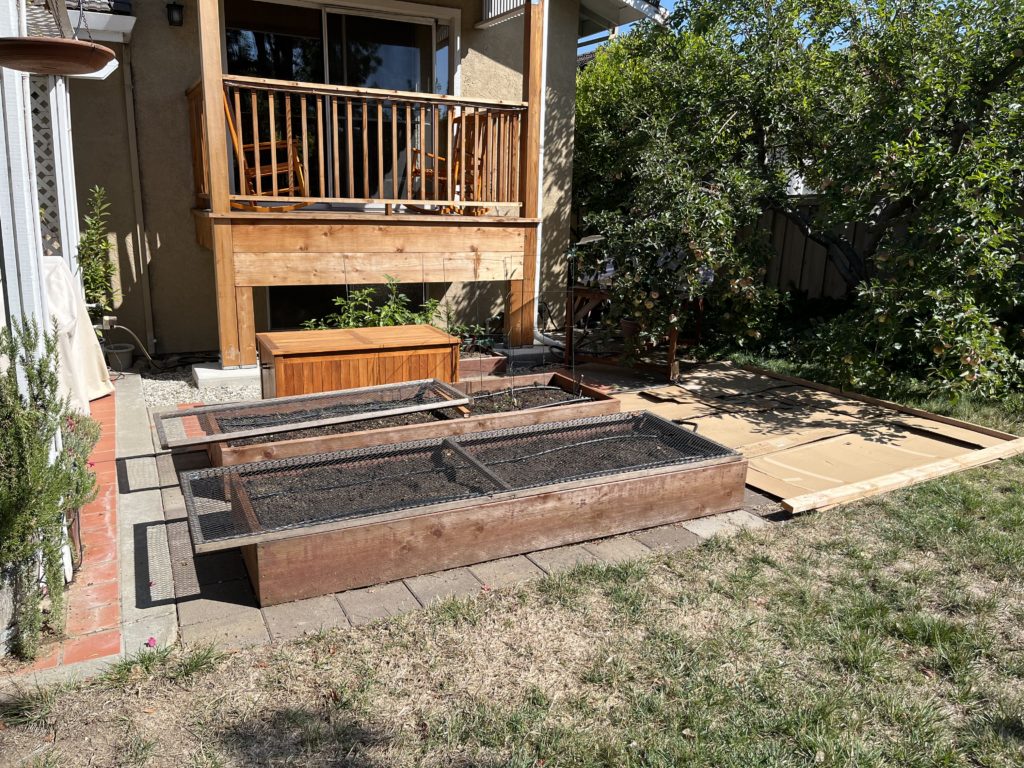
Apple tree harvested and trimmed by the arborist. Leaky garden faucets fixed, so time to continue construction.
Slight setback with phase 2: the bottom edges of cold frame 2 had rotted away (they were just stained shiplap). The frame rebuild added another layer of shiplap and used pressure treated wood for the base layer and uprights.
My trip to Tri City Rock to buy the pebbles was interesting, the conversation went something like this …
- Do you sell the Lodi pebbles by the bag?
- Yes we do.
- Then I’ll take 4 cubic foot bags please.
- OK, here’s your bags and there’s a shovel over there if you need it (I did).
Not quite what I’d expected, but those bags looked a lot bigger than 1 cubic foot so I thought I could get my money’s worth. What I failed to account for was how much a cubic foot of pebbles weighs, I couldn’t carry more than my fair measure.
After adding the wooden border, removing the dead lawn and laying 4 cubic feet of Lodi pebbles, phase 2 is complete. Well in time for spring planting and not too different from the original plan.
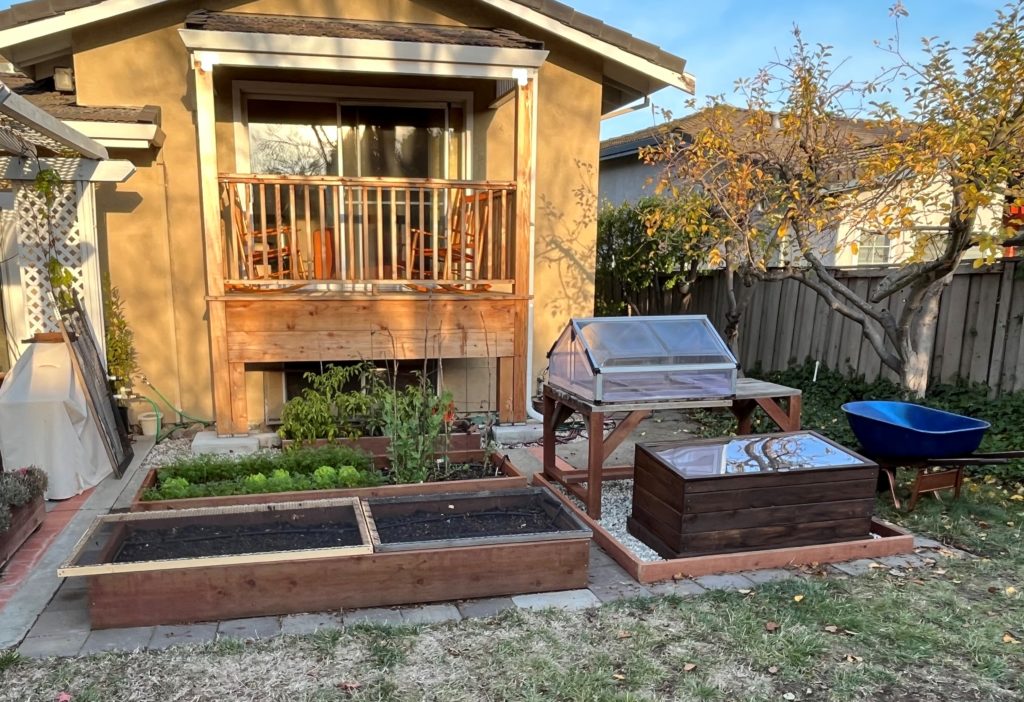
All that remains now is to finalize the irrigation system and plant the Spring crops.